Strengths
Your gun and armor can lead a push when they match up well against the enemy.
 THUNDERHQ
Ground RB / Vehicle Database / Profile
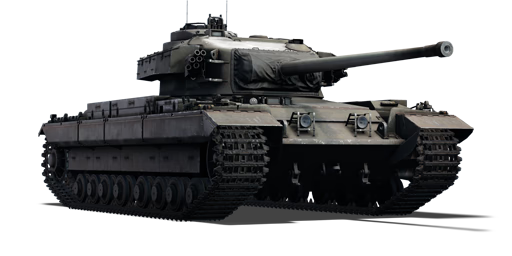
Great Britain · Heavy tank · Rank 5
These are archived ratings; check the game for current values. The history below shows recorded ratings and announced changes.
Fight from cover with teammates nearby to watch your sides. When the enemy fires, use their reload to take a shot and pull back. With solid kinetic ammunition, aim through a useful crew or module line rather than expecting an explosive filler to spread damage.
Your gun and armor can lead a push when they match up well against the enemy.
Bring it when you can hold a lane from cover. In an uptier, rely more on your position than your armor.
Keep your sides and rear out of view. The lower hull and area around the gun may also be weak spots, depending on the tank and the shell hitting it.
Keep exposed sides and the fighting compartment behind cover. Check the incoming round and impact angle in Protection Analysis before relying on the armor.
Use against armor and aim for crew or critical modules. A penetration alone may leave the enemy able to return fire.
Use against exposed crews, aircraft where applicable and lightly protected targets. Avoid spending the shot on heavy frontal armor.
Use against armor and aim for crew or critical modules. A penetration alone may leave the enemy able to return fire.
Place smoke between the enemy and a crossing or retreat route. It blocks sight; it does not stop incoming fire.
Carry enough for the route and resupply plan. A listed first-stage capacity alone does not establish a safe spawn load or prove that another rack is empty.
Top speed is not cross-country pace. Check the reverse route before taking a firing position.
| Date | Game mode | Battle rating |
|---|---|---|
| No confirmed battle rating changes are recorded. | ||
| Date / source | Arcade | Realistic | Simulator |
|---|---|---|---|
| October 8, 2026Site profile snapshot | 7.7 | 7.7 | 7.7 |
Vehicle data checked October 8, 2026. Crew optics checked October 22, 2026. Speeds use Realistic Battles values. Reload depends on crew skills and qualification; damage can reduce performance. Unknown equipment is not a confirmed absence.
Caernarvon vehicle guide · 0 comments