
USSR at BR 9.7
Build a lineup at BR 9.7
Choose combat vehicles at or below this Ground RB rating. Add lower-rated backups where needed, with air defense in a separate slot.
Tech-tree combat vehicles at this BR3
These are the tech-tree combat vehicles at this Ground RB rating, including foldered vehicles. Choose a mix of roles; you do not need to buy or crew them all.

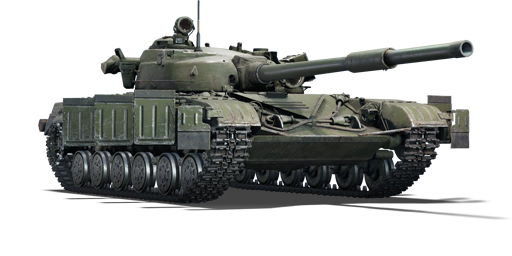

Suggested starting selection: T-72A, T-64A (1971), BMD-4M2, BMP-3.
Lineup completion choices1
Lower-BR vehicles or clearly labeled special vehicles used to round out this lineup.
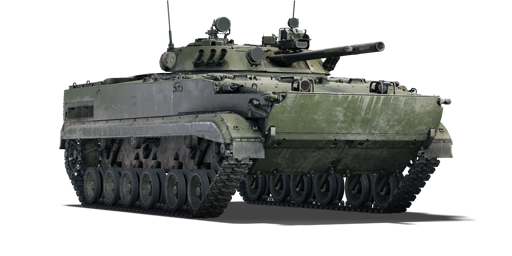
Additional combat options2
Other vehicles you can bring if they suit your play style.

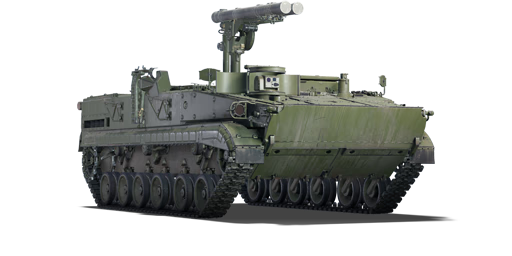
Air defense2
Add SPAA alongside your four combat vehicles. Choose it for the aircraft and helicopters you expect to face.


Premium and other optional vehicles · 0
How to play this lineup
Opening spawn
T-72A is the default opener. Establish a covered firing lane and check the equipment fitted to the chosen vehicle. Keep a retreat route before exposing the hull.
Urban maps
Avoid deep corner peeks in slow-reversing T-72 and T-90 variants. Approach with room to leave forward or behind cover.
Open maps
Check gun depression before committing to a ridge. Use folds in the terrain to conceal the hull; do not force a firing position that requires exposing the whole vehicle.
Uptier plan
Favor side angles and lanes you can cover with teammates when frontal armor or penetration becomes unreliable. Select the round for the exact target, range and impact angle.
Downtier plan
Apply pressure with teammates after an opponent fires. Stronger armor is an opportunity to control a lane, not a guarantee against every enemy gun.
Replacement spawns
T-64A (1971), BMD-4M2 and BMP-3 provide three further combat spawns. Change the lane or role after each loss. Air defense occupies a separate slot.
Across three matches, make an aimed shot from cover, retreat safely and contribute with a backup vehicle on a different useful lane.
Shoot from cover, pull back to reload and change your approach after a death. Get comfortable with all four combat vehicles before moving up.
Research the core vehicles and their useful ammunition, repair and fire-control modifications before moving to a higher-rated lineup.
Ammunition and stock grind
Check the vehicle guides for shell choices and ready-rack capacity. Start with useful anti-armor ammunition and available repair/firefighting upgrades, then unlock the equipment your role needs. Use your stock shells while researching better options.
Core lineup budget
Core lineup budget
For featured lineups, the total covers new core vehicles at this stop. Alternative lineups show the full core. SPAA, optional vehicles and the research path leading here cost extra.
| Vehicle | Research RP | Purchase SL | Basic crew SL |
|---|---|---|---|
| T-72A | 220,000 | 620,000 | 175,000 |
| T-64A (1971) | 190,000 | 520,000 | 150,000 |
| BMD-4M2 | 220,000 | 620,000 | 175,000 |
| Total | 630,000 | 1,760,000 | 500,000 |
Purchase + basic crew: 2,260,000 SL
Your remaining cost depends on what you’ve already researched, prerequisites, discounts and crew slots. Expert/ace training, modifications and repairs are extra.
When to move up
- You have at least four combat vehicles that give you different options after a loss.
- You have an SPAA option for the aircraft you expect to face; its BR can be lower than the lineup.
- You’re comfortable aiming the gun and using cover during the reload.
- You have useful backups for the new vehicle while you unlock its modifications.
Likely opponents
Examples from lower, equal and higher BRs to help you prepare. Which ones can be enemies depends on the nations on each team. This is not a ranking of how often they appear.
Centauro I 105 R · 10.0
Italy · Higher BR · uptier range · Light tank
Threat: Light tanks can reach your flank quickly. Check side routes before focusing on the main lane.
T-72A approach: Cover its escape route and avoid chasing into exposed ground. Recheck the flank after firing.
Aiming check: For the available kinetic rounds, test a shot path through crew or critical modules; penetration alone does not guarantee a knockout.
Opponent specifications ↗
Stingray · 9.7
Japan · Same BR · Light tank
Threat: Light tanks can reach your flank quickly. Check side routes before focusing on the main lane.
T-72A approach: Cover its escape route and avoid chasing into exposed ground. Recheck the flank after firing.
Aiming check: For the available kinetic rounds, test a shot path through crew or critical modules; penetration alone does not guarantee a knockout.
Opponent specifications ↗
Leopard 1A5 · 9.3
Italy · Lower BR · downtier range · Medium tank
Threat: A medium tank can fight in the main lane, then move to get a shot from another angle.
T-72A approach: Keep your hull covered, watch the return-fire lane and create crossfire instead of repeated frontal trades.
Aiming check: For the available kinetic rounds, test a shot path through crew or critical modules; penetration alone does not guarantee a knockout.
Opponent specifications ↗
Opponent shortlist · 12 vehicles
| Vehicle | Nation | Ground RB | Matchup | Role |
|---|---|---|---|---|
| Leopard 1A5 | Italy | 9.3 | Lower BR · downtier range | Medium tank |
| AMX-32 (105) | France | 9.3 | Lower BR · downtier range | Medium tank |
| Chieftain 900 | Great Britain | 9.3 | Lower BR · downtier range | Medium tank |
| CM11 | China | 9.3 | Lower BR · downtier range | Medium tank |
| Stingray | Japan | 9.7 | Same BR | Light tank |
| T-72M1 | Sweden | 9.7 | Same BR | Medium tank |
| T-72M1 | 9.7 | Same BR | Medium tank | |
| ◔T-72M1 | Italy | 9.7 | Same BR | Medium tank |
| Centauro I 105 R | Italy | 10.0 | Higher BR · uptier range | Light tank |
| Merkava Mk.1B | Israel | 10.0 | Higher BR · uptier range | Medium tank |
| Strf 9040B | Sweden | 10.0 | Higher BR · uptier range | Light tank |
| Type 16 | Japan | 10.0 | Higher BR · uptier range | Light tank |